
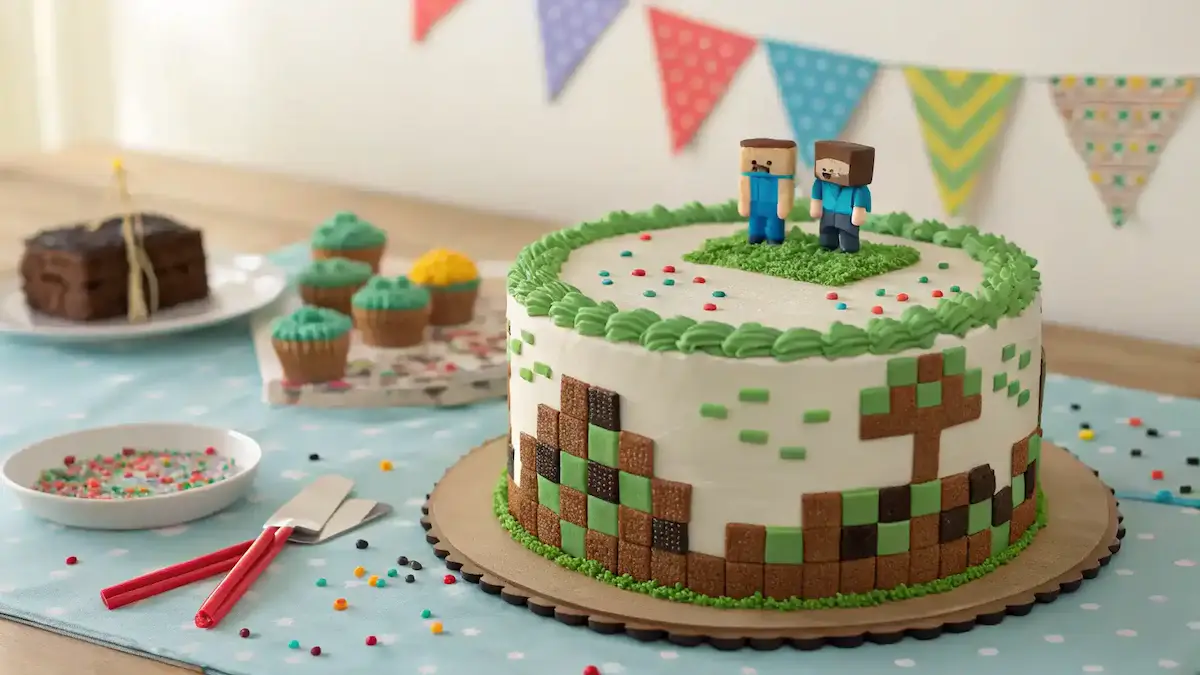
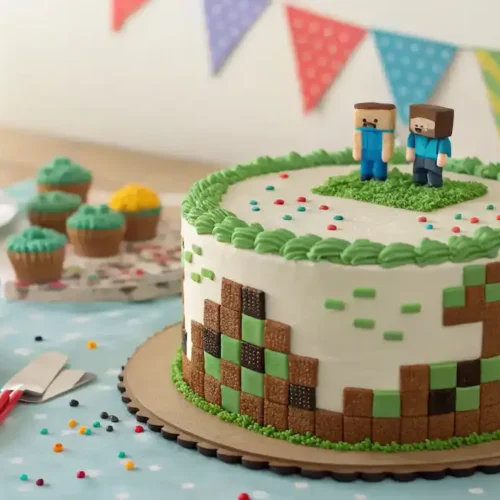
Are you ready to embark on a delicious adventure? The Minecraft Cake is not just a dessert; it’s a fun-filled experience that brings the beloved game to life in your kitchen. Whether you’re hosting a themed party or simply looking to bond with your family, this cake is the perfect choice. Not only does it allow for creativity in decorating, but it also engages kids and adults alike. So, gather your ingredients and let’s dive into the world of baking!
Minecraft Cake
Equipment
- 2 9-inch round cake pans Greased and floured or lined with parchment paper.
- 1 Mixing bowls For mixing dry and wet ingredients.
- 1 Whisk For mixing dry ingredients.
- 1 Electric mixer For creaming butter and sugar.
- 1 spatula For folding ingredients and frosting the cake.
- 1 wire rack For cooling the cakes.
Ingredients
Dry Ingredients
- 2 cups cake flour Can substitute with all-purpose flour.
- 1.5 cups granulated sugar Coconut sugar can be used as a healthier alternative.
- 1 tablespoon baking powder Ensure it’s fresh for the best rise.
Wet Ingredients
- 1 cup unsalted butter Softened to room temperature.
- 4 large eggs For a vegan option, use flax eggs.
- 1 cup milk Whole milk works best; almond or oat milk can be substitutes.
- 1 teaspoon vanilla extract Almond extract can be used for a different flavor.
Instructions
- First, preheat your oven to 350°F (175°C). This ensures that your cake bakes evenly.
- You will need 2 cups of cake flour, 1 ½ cups of sugar, 1 cup of unsalted butter (softened), 4 large eggs, 1 cup of milk, 1 tablespoon of baking powder, and 1 teaspoon of vanilla extract. Additionally, don’t forget your food coloring for that vibrant Minecraft look!
- In a large bowl, whisk together the cake flour and baking powder.
- In another bowl, cream the softened butter and sugar together until light and fluffy.
- Add the eggs one at a time, mixing well after each addition.
- Gradually add the dry mixture to the wet mixture, alternating with the milk. Mix until just combined.
- Divide the batter into separate bowls and add food coloring to each bowl.
- Grease and flour two 9-inch round cake pans.
- Pour the colored batter into the prepared pans and bake for 25-30 minutes.
- Remove the cakes from the oven and let them cool in the pans for about 10 minutes.
- Once the cakes are completely cool, place one layer on a serving plate and spread frosting on top before adding the second layer.
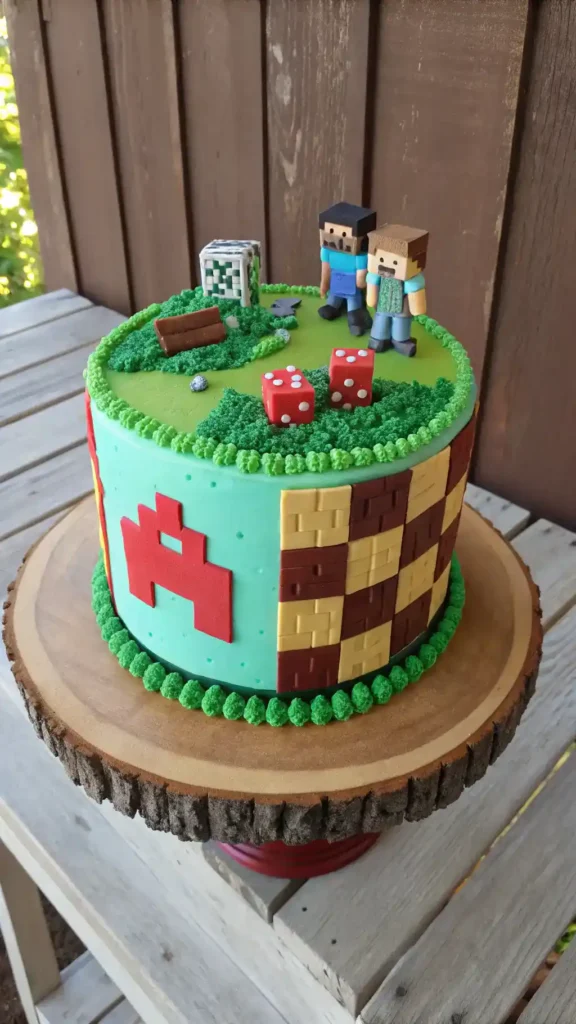
- Use additional frosting or edible decorations to create Minecraft-themed designs.
- Slice your Minecraft Cake and serve it at your next themed party.
Video
Notes
| Calories | Fat | Protein | Carbs |
|---|---|---|---|
| 350 | 15g | 4g | 50g |
Table of Contents
Key Benefits
When it comes to baking, creating a Minecraft Cake is not just about the delicious flavors. It’s also about the fun and creativity that come with it! This themed dessert is perfect for both kids and adults, making it an exciting project for family bonding. Here are some key benefits of diving into this delightful baking adventure:
- Engaging Activity: Baking a Minecraft Cake is a fantastic way to engage your kids. They can help with mixing, pouring, and decorating, turning the kitchen into a fun-filled activity zone.
- Creative Expression: The decorating process allows for endless creativity. You can use colorful frosting, edible decorations, and even Minecraft-themed figures to bring your cake to life!
- Perfect for Themed Parties: Hosting a Minecraft-themed party? This cake will be the star of the show! It’s sure to impress your guests and create memorable moments.
- Easy to Make: Despite its impressive appearance, a Minecraft Cake is surprisingly easy to make. With simple ingredients and straightforward steps, even beginner bakers can succeed.
- Deliciously Fun: Finally, let’s not forget the taste! A Minecraft Cake is not only visually appealing but also delicious, making it a treat everyone will enjoy.
So, gather your ingredients and get ready to embark on a baking journey that promises fun, creativity, and deliciousness with your Minecraft Cake!
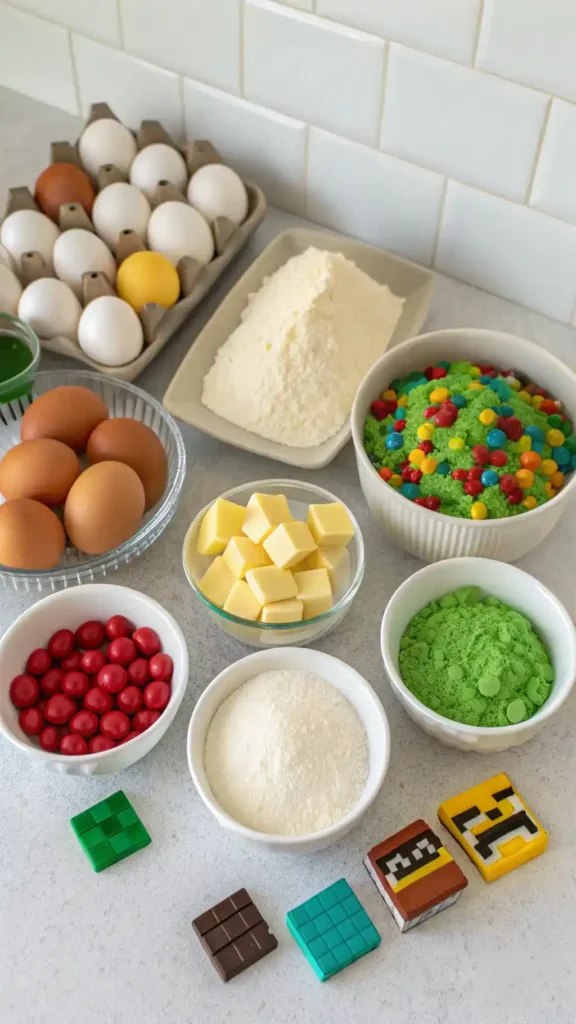
Ingredients
Creating a delightful Minecraft Cake is not only fun but also allows for a bit of creativity in the kitchen. Below, you’ll find a list of essential ingredients to bring this vibrant cake to life:
- 2 cups cake flour – This is the base of your cake. If you don’t have cake flour, you can substitute it with all-purpose flour, but the texture may be slightly denser.
- 1 ½ cups granulated sugar – Sweetness is key! You can use coconut sugar for a healthier alternative.
- 1 cup unsalted butter – Make sure it’s softened to room temperature for easy mixing. If you’re dairy-free, consider using vegan butter.
- 4 large eggs – Eggs help bind the ingredients. For a vegan option, you can use flax eggs (1 tablespoon of ground flaxseed mixed with 2.5 tablespoons of water per egg).
- 1 tablespoon baking powder – This is crucial for a fluffy cake. Ensure it’s fresh for the best rise.
- 1 teaspoon vanilla extract – This adds a lovely flavor. You can also use almond extract for a different twist.
- 1 cup milk – Whole milk works best, but almond or oat milk can be great substitutes.
- Food coloring – Choose vibrant colors to create the iconic Minecraft look. Gel food coloring is recommended for more intense hues.
- Frosting – You can use store-bought or homemade buttercream. For a healthier option, consider a whipped coconut cream.
- Chocolate chips – These are optional but add a delightful surprise in every slice!
When gathering your ingredients, remember that freshness matters. For instance, check the expiration date on your baking powder. Additionally, if you’re feeling adventurous, consider adding sprinkles or edible glitter to your frosting for that extra Minecraft magic. Overall, the ingredients for your Minecraft Cake are simple yet versatile, allowing you to customize based on your preferences. Happy baking!
How to Make Minecraft Cake
Making a Minecraft Cake is not only fun but also a delightful way to bring a piece of the game into your kitchen. Follow these step-by-step instructions to create a cake that looks just like the iconic blocks from Minecraft. Let’s dive in!
- Preheat Your Oven: First, preheat your oven to 350°F (175°C). This ensures that your cake bakes evenly. While the oven heats up, you can prepare your cake batter.
- Gather Your Ingredients: You will need 2 cups of cake flour, 1 ½ cups of sugar, 1 cup of unsalted butter (softened), 4 large eggs, 1 cup of milk, 2 teaspoons of baking powder, and 1 tablespoon of vanilla extract. Additionally, don’t forget your food coloring for that vibrant Minecraft look!
- Mix the Dry Ingredients: In a large bowl, whisk together the cake flour and baking powder. This step is crucial because it helps to aerate the flour, leading to a lighter cake.
- Cream the Butter and Sugar: In another bowl, cream the softened butter and sugar together until the mixture is light and fluffy. This usually takes about 3-5 minutes. Remember, the fluffier the mixture, the better your cake will rise!
- Add the Eggs: Next, add the eggs one at a time, mixing well after each addition. This helps to incorporate air into the batter, which is essential for a fluffy texture.
- Combine Wet and Dry Ingredients: Gradually add the dry mixture to the wet mixture, alternating with the milk. Start and end with the dry ingredients. Mix until just combined; overmixing can lead to a dense cake.
- Color the Batter: Divide the batter into separate bowls if you want different colors for your Minecraft Cake. Add food coloring to each bowl, mixing until you achieve your desired shades. For example, green for grass and brown for dirt!
- Prepare Your Baking Pans: Grease and flour two 9-inch round cake pans. This step is important to prevent sticking. Alternatively, you can line the pans with parchment paper for easier removal.
- Pour and Bake: Pour the colored batter into the prepared pans. Bake in the preheated oven for 25-30 minutes or until a toothpick inserted in the center comes out clean. Keep an eye on them, as oven temperatures can vary!
- Cool the Cakes: Once baked, remove the cakes from the oven and let them cool in the pans for about 10 minutes. Then, transfer them to a wire rack to cool completely. This step is essential to prevent the frosting from melting.
- Assemble the Cake: Once the cakes are completely cool, place one layer on a serving plate. Spread a layer of frosting on top, then add the second layer. Frost the top and sides of the cake, smoothing it out for a clean finish.
- Decorate: Now comes the fun part! Use additional frosting, edible decorations, or fondant to create Minecraft-themed designs. You can make pixelated patterns or even add small figurines for an extra touch!
- Serve and Enjoy: Finally, slice your Minecraft Cake and serve it at your next themed party. Your guests will be amazed by your creativity!
By following these steps, you’ll create a stunning Minecraft Cake that’s sure to impress. Remember, the key to a successful cake is patience and attention to detail. Enjoy your baking adventure!
Pro Tips, Variations & Common Problems
Making a Minecraft Cake is not only fun but also a great way to unleash your creativity. Here are some pro tips to ensure your cake turns out perfectly every time:
- Use Room Temperature Ingredients: Before you start, make sure your eggs and butter are at room temperature. This helps create a smoother batter and results in a fluffier cake.
- Don’t Overmix: When combining your dry and wet ingredients, mix just until combined. Overmixing can lead to a dense cake, which is not what we want for our Minecraft Cake!
- Check Your Oven Temperature: Ovens can vary, so it’s wise to use an oven thermometer. Baking at the right temperature is crucial for even baking.
- Layering for Texture: For added texture, consider adding chocolate chips or nuts to the batter. This not only enhances flavor but also gives your cake a delightful crunch.
- Creative Frosting: Use different colors of frosting to create a pixelated effect, mimicking the Minecraft aesthetic. You can also use fondant for a smoother finish.
Now, let’s explore some fun variations to make your Minecraft Cake even more exciting:
- Flavor Swaps: Instead of vanilla, try using almond or lemon extract for a unique twist. You can also substitute half of the flour with cocoa powder for a chocolate version.
- Fruit Additions: Incorporate mashed bananas or applesauce for added moisture and flavor. This can also make your cake a bit healthier!
- Gluten-Free Option: If you need a gluten-free version, swap regular flour for a gluten-free blend. Just ensure your baking powder is also gluten-free.
Despite your best efforts, you might encounter some common problems while baking your Minecraft Cake. Here’s how to troubleshoot:
- Flat Cake: If your cake doesn’t rise, it could be due to expired baking powder. Always check the expiration date before baking.
- Dry Cake: To avoid a dry texture, make sure not to overbake. Check for doneness a few minutes before the suggested time by inserting a toothpick; it should come out clean but not dry.
- Uneven Layers: If your cake layers are uneven, level them with a serrated knife after they cool. This will help with stacking and presentation.
By following these tips and variations, you’ll create a delightful Minecraft Cake that’s sure to impress. Remember, baking is all about experimenting, so don’t hesitate to make it your own!
Serving Suggestions
When it comes to presenting your delightful Minecraft Cake, the possibilities are as vast as the game itself! Here are some engaging serving ideas that will not only impress your guests but also enhance the overall experience of enjoying this themed dessert.
Plating Ideas
For a vibrant presentation, consider using colorful plates that reflect the game’s pixelated charm. You might also:
- Serve slices on green plates to mimic the lush grass of Minecraft.
- Garnish each slice with edible glitter or sprinkles to add a magical touch.
- Use cookie cutters to create fun shapes from leftover cake scraps, placing them around the main slice for a playful display.
Side Dish Pairings
To complement your Minecraft Cake, think about pairing it with some fun and thematic snacks. Here are a few ideas:
- Miniature fruit skewers resembling Minecraft’s blocky fruits, like watermelon cubes and grape clusters.
- Chocolate-covered pretzels that look like the game’s iconic blocks.
- A refreshing green smoothie or lemonade to keep the theme going while balancing the sweetness of the cake.
Creative Serving Options
Whether you’re hosting a casual gathering or a more elegant affair, here are some creative serving options:
- For a family-style setting, place the whole cake on a rustic wooden board, allowing guests to serve themselves.
- If you’re aiming for elegance, consider a tiered cake stand that showcases the Minecraft Cake alongside themed cupcakes.
- For a fun twist, serve the cake in mason jars, layering cake and frosting for individual portions that are easy to grab.
Presentation Tips
Finally, don’t forget the little details that can elevate your presentation:
- Use themed decorations, such as Minecraft figurines or block-shaped candles, to create a festive atmosphere.
- Consider a backdrop of pixelated banners or tablecloths that echo the game’s aesthetic.
- Lastly, provide colorful napkins and utensils that match the cake’s vibrant colors, making each bite feel special.
By incorporating these serving suggestions, your Minecraft Cake will not only taste amazing but also look like a true work of edible art. So, gather your friends and family, and get ready to dive into a delicious adventure!
Preserving and Reheating Your Minecraft Cake
After creating your delightful Minecraft Cake, you might wonder how to keep it fresh and tasty for later enjoyment. Fortunately, with the right storage and reheating techniques, you can maintain its flavor and texture, ensuring every slice is as delicious as the first!
Storage Tips
To store your Minecraft Cake properly, start by letting it cool completely. Once cooled, wrap it tightly in plastic wrap or place it in an airtight container. This helps prevent it from drying out. If you plan to enjoy it within a week, refrigeration is a great option. In the fridge, your cake will stay fresh for about 5 to 7 days. However, if you want to keep it longer, consider freezing it. When frozen, your Minecraft Cake can last for up to 3 months. Just be sure to wrap it well to avoid freezer burn. Additionally, if you have a vacuum sealer, using it can extend the cake’s freshness even further.
Food safety is crucial, so always check for any signs of spoilage before indulging. If you notice any unusual odors or mold, it’s best to discard the cake. Remember, keeping your cake at a consistent temperature is key to preventing bacterial growth.
Reheating Methods
When it comes to reheating your Minecraft Cake, you want to preserve its moistness and flavor. The oven is the best method for this. Preheat your oven to 350°F (175°C). Place the cake on a baking sheet and cover it loosely with aluminum foil to retain moisture. Heat it for about 10 to 15 minutes, checking occasionally to ensure it doesn’t dry out. Alternatively, if you’re in a hurry, the microwave can work too. Just place a slice on a microwave-safe plate and cover it with a damp paper towel. Heat it in 10-second intervals until warm, but be careful not to overdo it, as this can lead to a dry texture.
If you have an air fryer, it can also be a fantastic option! Set it to 300°F (150°C) and heat the cake for about 5 minutes, checking to ensure it stays moist. For an extra touch, consider adding a drizzle of simple syrup or a dollop of whipped cream before reheating. This will enhance the cake’s moisture and flavor, making each bite a delightful experience.
By following these storage and reheating tips, you can enjoy your Minecraft Cake long after it’s been baked, keeping the fun and flavor alive!
Conclusion
As we wrap up this delightful journey of creating a Minecraft Cake, let’s take a moment to reflect on the key steps that brought this fun dessert to life. From mixing the vibrant batter to layering and decorating with your favorite frosting, each step is not only simple but also a fantastic way to unleash your creativity. This recipe is perfect for themed parties, family gatherings, or just a fun baking day at home. So, I encourage you to gather your ingredients and dive into this exciting baking adventure!
Moreover, I would love to hear about your baking experience! Feel free to share your results or ask any questions you might have. Remember, cooking is all about exploration, so don’t hesitate to experiment with different flavors or decorations to make your Minecraft Cake uniquely yours. Whether you choose to add colorful sprinkles or try a new frosting flavor, the possibilities are endless.
In conclusion, baking this Minecraft Cake is not just about the final product; it’s about the joy of creating and the memories made along the way. So, roll up your sleeves, have fun in the kitchen, and enjoy every moment of this delicious process. Happy baking!
FAQs about Minecraft Cake
Here are some common questions you might have while making your delightful Minecraft Cake. We hope these answers help you create the perfect dessert!
1. Can I use a different type of flour for my Minecraft Cake?
Absolutely! While cake flour gives the best texture, you can use all-purpose flour instead. Just remember to adjust the liquid slightly, as all-purpose flour absorbs more moisture. Additionally, for gluten-free options, consider using a gluten-free flour blend.
2. How can I make my cake more colorful?
To achieve vibrant colors, use gel food coloring instead of liquid. Gel colors are more concentrated, so you’ll need less. Start with a small amount and gradually add more until you reach your desired shade. Moreover, you can mix different colors to create unique hues!
3. What should I do if my cake sinks in the middle?
If your Minecraft Cake sinks, it might be due to underbaking or too much leavening agent. Ensure your oven is preheated and check for doneness with a toothpick. If it comes out clean, your cake is ready! Also, avoid opening the oven door too early, as this can cause the cake to collapse.
4. How do I store leftover Minecraft Cake?
To keep your cake fresh, wrap it tightly in plastic wrap or store it in an airtight container. It can last up to three days at room temperature. Alternatively, for longer storage, freeze individual slices. Just make sure to wrap them well to prevent freezer burn!
5. Can I make this cake ahead of time?
Yes, you can! Bake the cake a day or two in advance. Just ensure it cools completely before wrapping it. When you’re ready to serve, you can frost it and add decorations. This way, you’ll save time on the day of your party!