
Are you ready to transform your mornings with a delightful twist? Cookie cereal offers a unique combination of sweetness and crunch that makes breakfast not only enjoyable but also satisfying. This versatile breakfast option appeals to both kids and adults alike. Moreover, it provides an energy boost to kickstart your day. With its quick prep time, you can whip up a batch in no time, making it perfect for busy mornings. So, let’s dive into the world of cookie cereal and discover how to create this delicious breakfast that everyone will love!
Table of Contents
Key Benefits
Cookie cereal offers a delightful combination of sweetness and crunch, making it an enjoyable breakfast choice that appeals to both kids and adults. Here are some key benefits that make cookie cereal a fantastic addition to your morning routine:
- Nutritional Value: Packed with wholesome ingredients like oats and natural sweeteners, cookie cereal provides essential nutrients to kickstart your day.
- Energy Boost: The combination of carbohydrates and healthy fats gives you a sustained energy boost, perfect for busy mornings.
- Satisfying Crunch: The crunchy texture of cookie cereal is not only enjoyable but also adds a fun element to your breakfast.
- Versatile Breakfast Option: You can enjoy cookie cereal with milk, yogurt, or even as a topping for smoothie bowls.
- Kid-Friendly: Kids love the sweet taste and fun shapes, making it a great way to get them excited about breakfast.
- Quick Prep Time: With minimal preparation, cookie cereal is perfect for those hectic mornings when you need something quick yet delicious.
Incorporating cookie cereal into your breakfast routine not only makes mornings easier but also adds a touch of joy to your day. So, why not give it a try? You might just find your new favorite breakfast!
Ingredients
To create your delightful cookie cereal, gather the following wholesome ingredients:
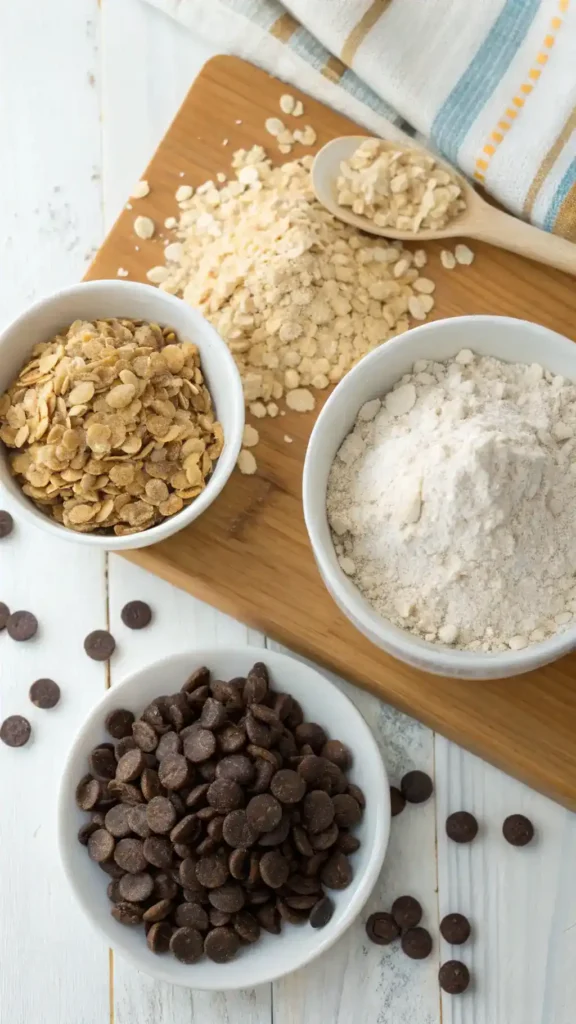
- Oats: Rolled oats are perfect for that satisfying crunch. They provide whole grains and are a great source of fiber.
- Flour Alternatives: You can use all-purpose flour, but for a healthier twist, consider almond or coconut flour. These options add unique flavors and textures.
- Natural Sweeteners: Honey or maple syrup works wonders for sweetness. They not only enhance flavor but also contribute to the nutritional value.
- Baking Powder: This ingredient is essential for achieving that perfect rise and lightness in your cookie cereal.
- Flavorings: Don’t forget to add vanilla extract or a sprinkle of cinnamon. These will elevate the taste and make your cookie cereal irresistible.
- Chocolate Chips: For that classic cookie flavor, chocolate chips are a must! You can also opt for dark chocolate for a richer taste.
When selecting your ingredients, consider quality. For instance, organic oats and natural sweeteners can enhance the overall flavor and nutritional value. Additionally, if you’re looking for a gluten-free option, simply swap out regular flour for a gluten-free alternative. This way, everyone can enjoy cookie cereal, regardless of dietary restrictions.
Overall, these ingredients not only contribute to a delicious breakfast but also provide an energy boost to kickstart your day. So, gather your supplies and get ready to whip up a batch of cookie cereal that’s sure to please both kids and adults alike!
How to Make Cookie Cereal
Making cookie cereal is a straightforward process that will delight both kids and adults alike. Follow these easy steps to whip up a batch of this sweet, crunchy breakfast option.
- Preheat your oven: Start by preheating your oven to 350°F (175°C). This ensures that your cookie cereal bakes evenly and achieves that perfect golden brown color.
- Prepare your baking sheet: Line a baking sheet with parchment paper. This will prevent sticking and make cleanup a breeze.
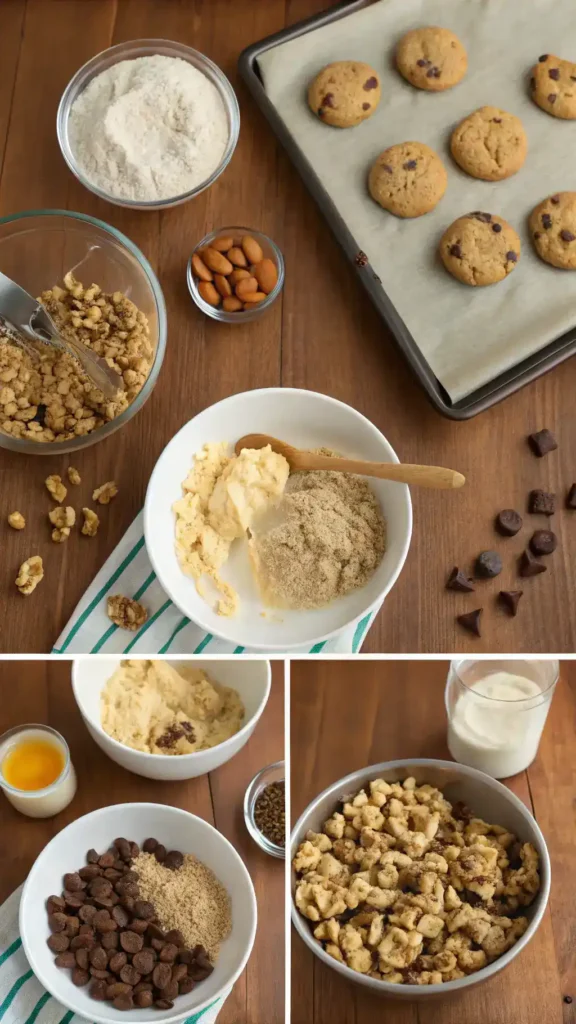
- Mix dry ingredients: In a mixing bowl, combine 2 cups of oats, 1 cup of flour (or your preferred flour alternative), 1 teaspoon of baking powder, and a pinch of salt. Stir these ingredients together until they are well mixed.
- Add sweeteners and flavorings: Next, add ½ cup of your favorite natural sweetener, such as honey or maple syrup, along with 1 teaspoon of vanilla extract. Mix these wet ingredients into the dry mixture until everything is combined.
- Incorporate chocolate chips: Fold in ½ cup of chocolate chips or any other mix-ins you desire. This step adds that irresistible cookie flavor that makes cookie cereal so delightful.
- Check dough consistency: The dough should be slightly sticky but manageable. If it feels too dry, add a splash of milk or water to achieve the right consistency.
- Spread the dough: Transfer the dough onto the prepared baking sheet. Use a spatula to spread it evenly, ensuring it’s about ¼ inch thick. This thickness will help achieve that satisfying crunch.
- Bake to perfection: Place the baking sheet in the preheated oven and bake for 15-20 minutes. Keep an eye on it, as baking times may vary. You want it to be golden brown and firm to the touch.
- Cool and break apart: Once baked, remove the cookie cereal from the oven and let it cool for a few minutes. Afterward, break it into bite-sized pieces. This will give you that perfect cereal texture.
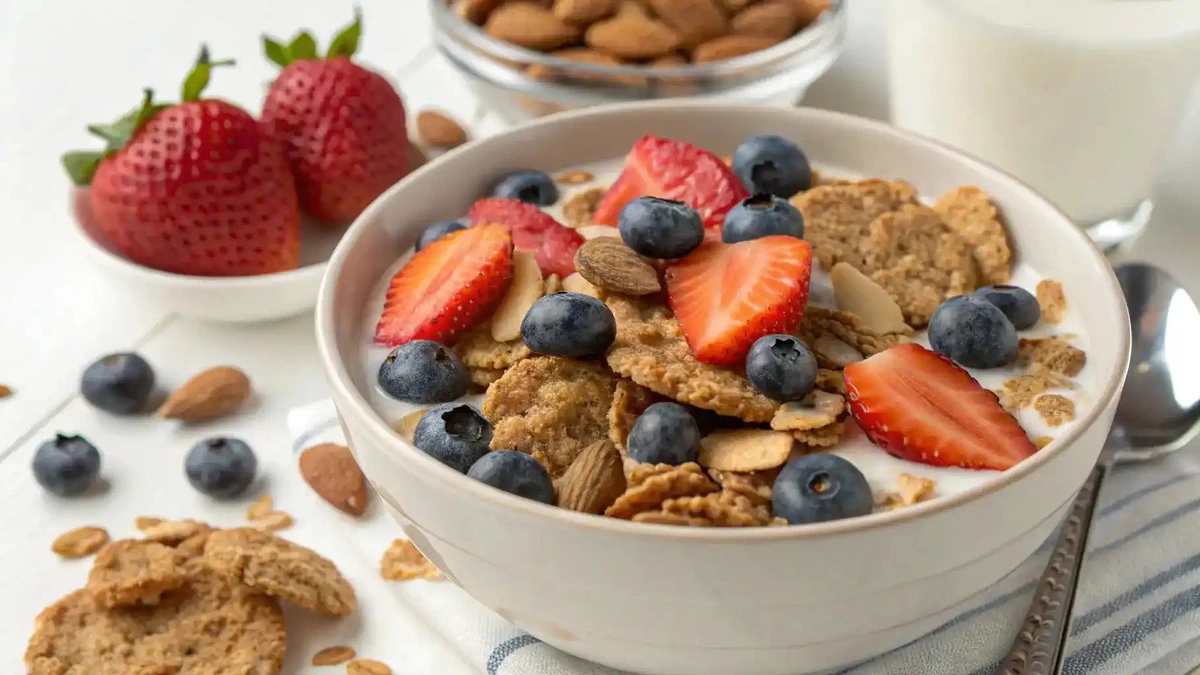
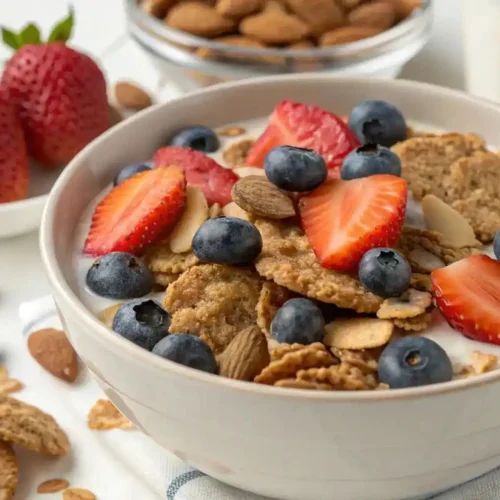
- Enjoy your cookie cereal: Finally, serve your cookie cereal in a bowl with milk or yogurt. You can also top it with fresh fruits or nuts for added nutrition and flavor.
By following these steps, you’ll create a delicious cookie cereal that not only provides an energy boost but also serves as a versatile breakfast option. Enjoy your homemade cookie cereal, and feel free to experiment with different ingredients to make it your own!
Pro Tips, Variations & Common Problems
Making cookie cereal can be a delightful experience, but sometimes, things don’t go as planned. Here are some pro tips and variations to help you create the perfect batch, along with solutions to common problems you might encounter.
Pro Tips
– For a satisfying crunch, ensure you spread the dough evenly on the baking sheet. This helps it bake uniformly.
– If you want to customize your cookie cereal, consider adding nut butters like almond or peanut for richness.
– Dried fruits such as raisins or cranberries can add a delightful sweetness.
– For a gluten-free option, use almond or coconut flour instead of regular flour.
– Experiment with different sweeteners, like agave syrup or coconut sugar, to find your favorite flavor profile.
Common Problems & Solutions
– Dough Consistency: If your dough is too dry, add a splash of milk or a bit more sweetener. Conversely, if it’s too wet, gradually incorporate more flour until you reach the desired consistency.
– Baking Issues: If your cookie cereal is browning too quickly, lower the oven temperature by 25°F and extend the baking time. This will help it cook evenly without burning.
– Texture Problems: If your cookie cereal turns out too soft, it may need more baking time. Check for a golden-brown color, which indicates it’s ready.
– Flavor Balance: If the flavor seems off, consider adding a pinch of salt or a splash of vanilla extract to enhance the overall taste.
By keeping these tips in mind, you can easily troubleshoot any issues and create a delicious cookie cereal that everyone will love. Remember, cookie cereal is a versatile breakfast option, so feel free to get creative!
Serving Suggestions
Cookie cereal is not just a delightful breakfast; it’s a canvas for creativity! Here are some engaging serving ideas that will elevate your cookie cereal experience, making it visually appealing and delicious.
- Breakfast Bowls: Start with a generous scoop of cookie cereal in a bowl. Pour your choice of milk or a dairy-free alternative, such as almond or oat milk, over the top. This classic approach is not only satisfying but also allows the cereal to soak up the milk, enhancing its flavor.
- Top It Off: For added nutrition and flavor, consider topping your cookie cereal with fresh fruits like sliced bananas, berries, or even diced apples. Nuts, such as almonds or walnuts, can add a satisfying crunch, making your breakfast even more delightful.
- Yogurt Parfaits: Layer cookie cereal with yogurt for a fun twist. Start with a layer of yogurt, followed by a layer of cookie cereal, and repeat. This not only looks beautiful but also provides a creamy texture that complements the crunch of the cereal.
- Family-Style Serving: If you’re serving a crowd, consider a family-style setup. Place a large bowl of cookie cereal in the center of the table, surrounded by various toppings like fruits, nuts, and different milk options. This way, everyone can customize their bowl to their liking, making it a fun and interactive breakfast experience.
- Snack Time: Cookie cereal isn’t just for breakfast! Serve it as a snack in a cute jar or a small bowl. Pair it with a side of nut butter for dipping or a handful of dried fruits for a sweet touch. This makes for a kid-friendly snack that’s perfect for any time of the day.
In addition, don’t forget about presentation! Use colorful bowls or mason jars to serve your cookie cereal, and consider garnishing with a sprig of mint or a sprinkle of cinnamon for an extra pop of color. Overall, these serving suggestions will not only make your cookie cereal look appealing but also enhance its taste, ensuring a delightful experience for everyone.
Preserving and Reheating Cookie Cereal
To keep your Cookie Cereal fresh and delicious, proper storage is key. First and foremost, store it in an airtight container or a Ziplock bag. This will help maintain its satisfying crunch for several days. If you want to prepare it in advance, consider freezing portions for longer storage. When stored in the fridge, your Cookie Cereal can last up to a week, while in the freezer, it can stay fresh for up to three months. However, always remember to label your containers with the date to keep track of freshness. Additionally, to prevent spoilage or bacterial growth, ensure that your cereal is completely cooled before sealing it away. This simple step helps avoid moisture buildup, which can lead to sogginess.
Reheating Methods
When it comes to reheating your Cookie Cereal, you have several options to choose from. The oven is a fantastic choice if you want to restore that delightful crunch. Preheat your oven to 350°F (175°C). Spread the cereal evenly on a baking sheet and heat it for about 5-7 minutes. This method ensures that your cereal warms up without drying out. Alternatively, if you’re short on time, the microwave is a quick option. Place your Cookie Cereal in a microwave-safe bowl and cover it with a damp paper towel. Heat it in 30-second intervals, stirring in between, until warmed through. This technique adds a bit of moisture back into the cereal, preventing it from becoming too dry. If you have an air fryer, you can also use it to reheat your cereal. Set it to 300°F (150°C) and heat for about 3-5 minutes, checking frequently to avoid overcooking. Regardless of the method you choose, always keep an eye on your Cookie Cereal to ensure it retains its delicious flavor and texture.
Conclusion
In conclusion, making cookie cereal is a delightful and straightforward process that brings joy to both kids and adults alike. By combining wholesome ingredients like oats, natural sweeteners, and chocolate chips, you create a delicious breakfast option that is not only satisfying but also versatile. This recipe allows for quick prep time, making it perfect for busy mornings or a fun weekend treat. So, gather your ingredients, follow the simple steps, and enjoy the sweet, crunchy goodness of homemade cookie cereal.
We would love to hear about your experience! Feel free to share your results or ask any questions you may have. Additionally, don’t hesitate to experiment with different variations or pairings, such as adding dried fruits or nuts, to make this recipe your own. Remember, cooking is all about creativity and enjoyment, and cookie cereal is an excellent way to express that in the kitchen. So, roll up your sleeves and dive into this fun culinary adventure!
FAQs
Q1: Can I make cookie cereal gluten-free?
Absolutely! Simply substitute regular flour with a gluten-free alternative like almond or coconut flour. This way, you can enjoy cookie cereal without worrying about gluten.
Q2: How long does cookie cereal last?
When stored properly in an airtight container, cookie cereal can last up to a week at room temperature. For longer freshness, consider freezing it.
Q3: What can I use instead of chocolate chips?
You can use dried fruits, nuts, or even seeds for a different flavor profile. This adds variety and keeps your cookie cereal exciting!
Q4: Can I make this recipe vegan?
Yes, you can easily make cookie cereal vegan by using plant-based sweeteners and dairy alternatives. For instance, opt for maple syrup instead of honey.
Q5: How can I customize my cookie cereal?
There are many ways to customize cookie cereal! You can add nut butters for richness or dried fruits for added sweetness. Additionally, feel free to experiment with different flavorings to suit your taste.
Cookie Cereal
Equipment
- 1 Baking sheet Line with parchment paper.
- 1 Mixing bowl For combining dry and wet ingredients.
- 1 spatula For spreading the dough.
Ingredients
Dry Ingredients
- 2 cups Oats Rolled oats for crunch.
- 1 cup Flour All-purpose or alternative flour.
- 1 teaspoon Baking Powder For rise and lightness.
- 1 pinch Salt Enhances flavor.
Wet Ingredients
- ½ cup Natural Sweetener Honey or maple syrup.
- 1 teaspoon Vanilla Extract For flavor.
Mix-ins
- ½ cup Chocolate Chips For classic cookie flavor.
Instructions
Preparation
- Preheat your oven to 350°F (175°C). Line a baking sheet with parchment paper.
Mixing
- In a mixing bowl, combine oats, flour, baking powder, and salt. Stir until well mixed. Add sweeteners and vanilla extract, mixing until combined.
Baking
- Fold in chocolate chips. Spread the dough onto the baking sheet, about ¼ inch thick. Bake for 15-20 minutes until golden brown. Cool and break into pieces.
Serving
- Serve in a bowl with milk or yogurt, and top with fruits or nuts if desired.
Video
Notes
| Calories | Fat | Protein | Carbs |
|---|---|---|---|
| 200 | 8g | 4g | 30g |