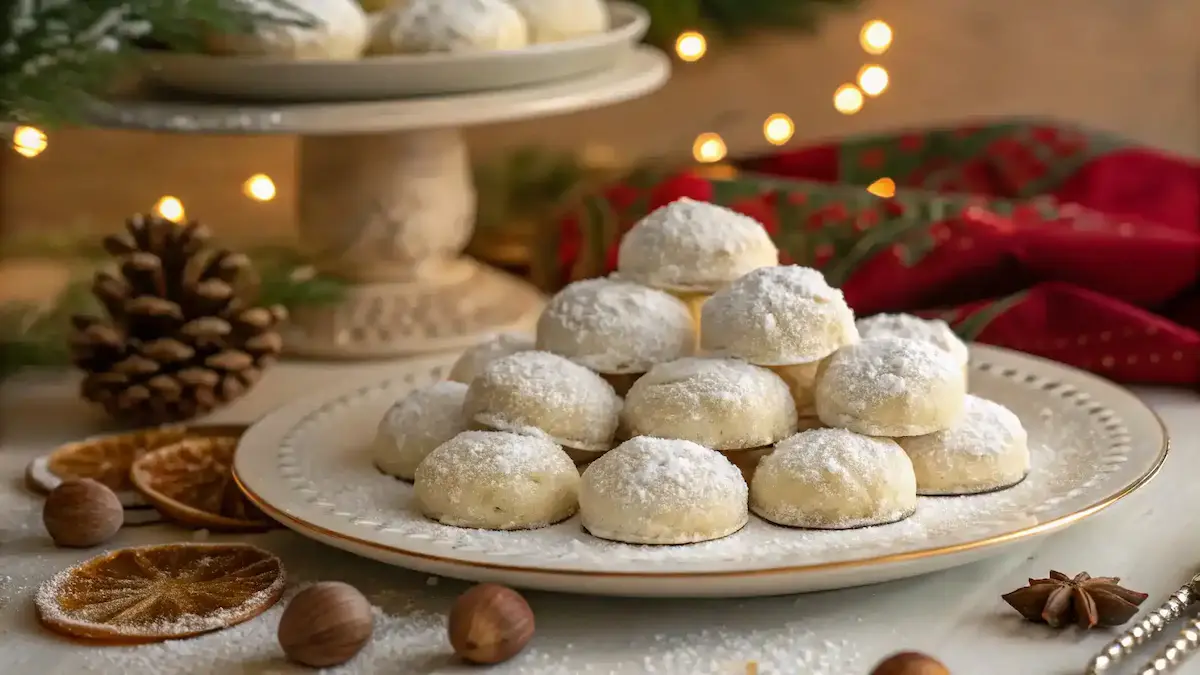
Have you ever tasted a cookie that not only delights your palate but also carries a rich cultural heritage? Danish Wedding Cookies are just that! These festive treats are not only easy to make but also a crowd-pleaser at any celebration. With their sweet, nutty flavors and melt-in-your-mouth texture, they embody the essence of Danish culture and wedding celebrations. Danish Wedding Cookies are part of the broader Danish cuisine, which emphasizes traditional pastries and baked goods rooted in centuries-old culinary customs. So, gather your loved ones and join in on the fun of baking these delightful cookies that are sure to create memorable experiences.
Danish Wedding Cookies
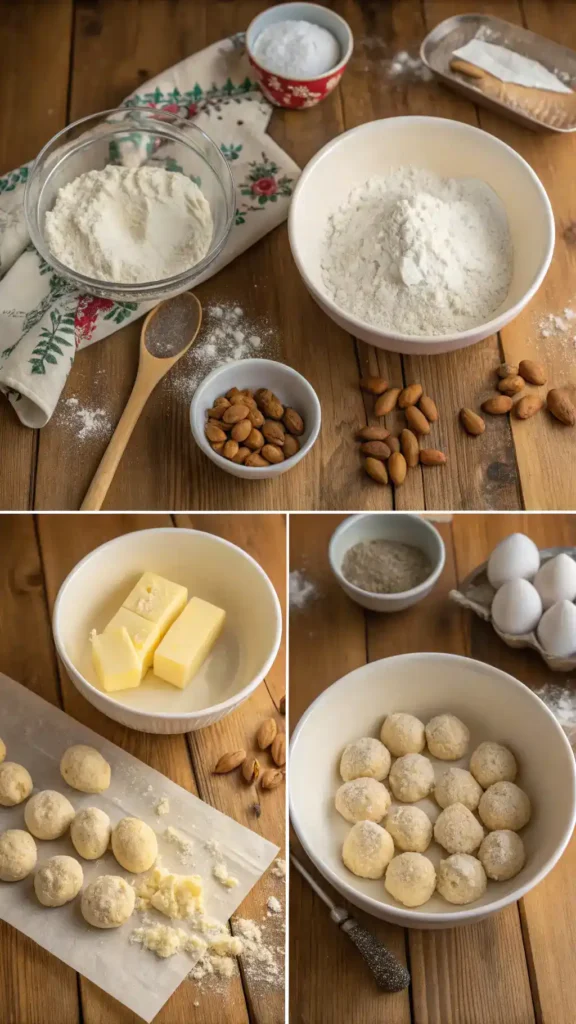
Equipment
- 1 Mixing bowl For creaming butter and sugar.
- 1 Baking sheet For baking the cookies.
- 1 Parchment paper To line the baking sheet.
- 1 Whisk For combining dry ingredients.
Ingredients
Nuts
- 1 cup finely chopped almonds These nuts add a delightful crunch and nutty flavor. If you have nut allergies, consider using sunflower seeds as a substitute.
Sweeteners
- 1 cup powdered sugar This sweetener gives the cookies their signature sweetness and helps create that melt-in-your-mouth texture.
- 1 cup unsalted butter For richness, use room temperature butter. If you prefer a dairy-free option, coconut oil works well.
Flavorings
- 1 teaspoon pure vanilla extract This ingredient enhances the flavor beautifully. Always opt for pure extract over imitation for the best results.
- 2 cups all-purpose flour This provides the structure needed for the cookies. For a gluten-free version, almond flour is an excellent alternative.
- 1/2 teaspoon baking powder A pinch of this helps the cookies rise perfectly, ensuring they are light and airy.
Instructions
Preheat Oven
- Start by preheating your oven to 350°F (175°C). This step is crucial because it ensures even baking.
Cream Butter and Sugar
- In a mixing bowl, cream together 1 cup of unsalted butter and ½ cup of powdered sugar until the mixture is light and fluffy. This process incorporates air, giving your cookies a lovely texture.
Add Vanilla
- Next, mix in 1 teaspoon of pure vanilla extract. This will enhance the delightful flavors of your Danish Wedding Cookies.
Combine Dry Ingredients
- In another bowl, whisk together 2 cups of all-purpose flour, 1 teaspoon of baking powder, and a pinch of salt. This step helps to evenly distribute the baking powder throughout the flour.
Incorporate Dry Ingredients
- Gradually add the dry mixture to the butter mixture. Stir until just combined, being careful not to overmix, as this can lead to tough cookies.
Add Almonds
- Fold in 1 cup of finely chopped almonds. These nuts not only add flavor but also provide that signature crunch.
Shape Cookies
- Using your hands, shape the dough into small balls, about 1 inch in diameter. Place them on a baking sheet lined with parchment paper, spacing them about 2 inches apart.
Bake
- Bake the cookies in your preheated oven for 10-12 minutes or until they are lightly golden. Keep an eye on them, as overbaking can lead to dryness.
Cool and Roll
- Once baked, remove the cookies from the oven and let them cool on the baking sheet for a few minutes. Afterward, roll them in powdered sugar while they are still warm for that classic finish.
Video
Notes
Table of Contents
Discover the Sweet Tradition of Danish Wedding Cookies
Danish Wedding Cookies are not just delightful treats; they carry a rich cultural significance that makes them perfect for any celebration. Here are some key benefits of these beloved cookies that will surely inspire you to bake a batch!
1. A Taste of Tradition
Firstly, Danish Wedding Cookies embody the essence of Danish culture. They are often served at weddings, symbolizing love and unity. By making these cookies, you’re not only indulging in a sweet treat but also participating in a beautiful tradition that has been passed down through generations.
2. Delightful Flavors
Moreover, the sweet, nutty flavor of Danish Wedding Cookies is simply irresistible. The combination of finely chopped almonds and rich butter creates a melt-in-your-mouth experience that guests will rave about. Consequently, these cookies are a crowd-pleaser at any gathering, from casual tea times to festive celebrations.
3. Easy to Make
Another key benefit is that Danish Wedding Cookies are incredibly easy to make. With just a few simple ingredients, you can whip up a batch in no time. This means that even novice bakers can join in on the fun, making it a perfect family activity. So, gather your loved ones and create sweet memories together!
4. Versatile for Any Occasion
Furthermore, these cookies are versatile enough to suit various occasions. Whether you’re hosting a wedding, a holiday party, or simply enjoying a cozy afternoon at home, Danish Wedding Cookies fit right in. They can be served on a decorative platter or included in a dessert buffet, adding a touch of elegance to any event.
5. Lasting Freshness
Lastly, Danish Wedding Cookies have a great shelf life. When stored properly in an airtight container, they can stay fresh for up to a week. If you want to enjoy them longer, you can freeze them for up to three months. This means you can prepare them ahead of time, making your celebrations even more stress-free.
In summary, Danish Wedding Cookies are not only a sweet indulgence but also a way to connect with cultural heritage. Their delightful flavors, ease of preparation, and versatility make them a must-try for any baking enthusiast. So, why not embrace this sweet tradition and create your own batch of Danish Wedding Cookies today?
Ingredients
To create the perfect batch of Danish Wedding Cookies, you will need the following ingredients:
- 1 cup finely chopped almonds – These nuts add a delightful crunch and nutty flavor. If you have nut allergies, consider using sunflower seeds as a substitute.
- 1 cup powdered sugar – This sweetener gives the cookies their signature sweetness and helps create that melt-in-your-mouth texture.
- 1 cup unsalted butter – For richness, use room temperature butter. If you prefer a dairy-free option, coconut oil works well.
- 1 teaspoon pure vanilla extract – This ingredient enhances the flavor beautifully. Always opt for pure extract over imitation for the best results.
- 2 cups all-purpose flour – This provides the structure needed for the cookies. For a gluten-free version, almond flour is an excellent alternative.
- 1/2 teaspoon baking powder – A pinch of this helps the cookies rise perfectly, ensuring they are light and airy.
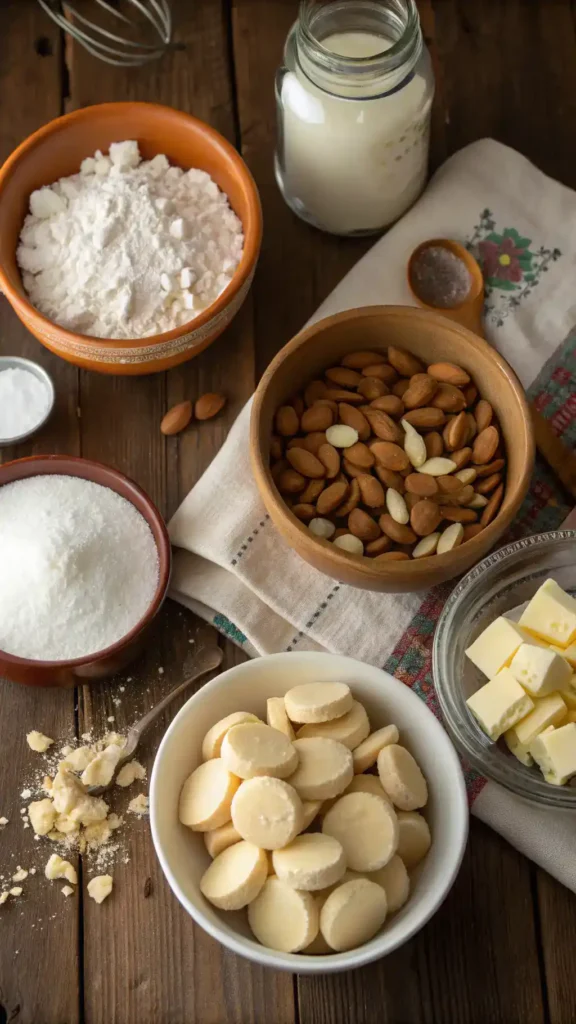
These simple yet high-quality ingredients come together to create a delightful treat that embodies the cultural significance of Danish Wedding Cookies. Remember, the key to achieving the best flavor is to use fresh ingredients. So, check your pantry before you start baking!
How to Make Danish Wedding Cookies
Making Danish Wedding Cookies is a delightful experience that brings the rich cultural heritage of Denmark right into your kitchen. Follow these simple steps to create these melt-in-your-mouth treats that are perfect for any celebration.
- Preheat your oven: Start by preheating your oven to 350°F (175°C). This step is crucial because it ensures even baking.
- Cream the butter and sugar: In a mixing bowl, cream together 1 cup of unsalted butter and ½ cup of powdered sugar until the mixture is light and fluffy. This process incorporates air, giving your cookies a lovely texture.
- Add the vanilla: Next, mix in 1 teaspoon of pure vanilla extract. This will enhance the delightful flavors of your Danish Wedding Cookies.
- Combine dry ingredients: In another bowl, whisk together 2 cups of all-purpose flour, 1 teaspoon of baking powder, and a pinch of salt. This step helps to evenly distribute the baking powder throughout the flour.
- Incorporate the dry ingredients: Gradually add the dry mixture to the butter mixture. Stir until just combined, being careful not to overmix, as this can lead to tough cookies.
- Add the almonds: Fold in 1 cup of finely chopped almonds. These nuts not only add flavor but also provide that signature crunch.
- Shape the cookies: Using your hands, shape the dough into small balls, about 1 inch in diameter. Place them on a baking sheet lined with parchment paper, spacing them about 2 inches apart.
- Bake: Bake the cookies in your preheated oven for 10-12 minutes or until they are lightly golden. Keep an eye on them, as overbaking can lead to dryness.
- Cool and roll: Once baked, remove the cookies from the oven and let them cool on the baking sheet for a few minutes. Afterward, roll them in powdered sugar while they are still warm for that classic finish.
By following these steps, you’ll create delicious Danish Wedding Cookies that embody the sweet tradition of Danish culture. Enjoy the delightful flavors and share them with friends and family!
Pro Tips, Variations, and Common Problems
When it comes to making Danish Wedding Cookies, a few pro tips can elevate your baking game. Firstly, ensure your butter is at room temperature. This step is crucial for achieving that light and fluffy texture. Additionally, if you want to make these cookies gluten-free, simply substitute all-purpose flour with almond flour. This swap not only maintains the flavor but also enhances the nutty profile of the cookies.
Now, let’s talk about common mistakes. One frequent issue is overbaking, which can lead to dry cookies. Therefore, keep a close eye on them as they bake. Ideally, they should be lightly golden and still soft to the touch. If you find your dough too crumbly, don’t worry! Just add a teaspoon of milk to help bind the ingredients together.
For those looking to add a twist, consider incorporating citrus zest or spices like cinnamon. These additions can bring a delightful depth of flavor to your Danish Wedding Cookies. Moreover, if you want to experiment with different nuts, feel free to swap almonds for walnuts or pecans. Each nut offers a unique taste that can change the cookie’s character.
Lastly, remember that presentation matters! After rolling your cookies in powdered sugar, consider adding a drizzle of chocolate or colorful sprinkles for a festive touch. This not only enhances their visual appeal but also makes them even more enticing for your guests.
Serving Suggestions for Danish Wedding Cookies
When it comes to serving Danish Wedding Cookies, the presentation can elevate these delightful treats to a whole new level. Not only do they taste amazing, but they also bring a touch of elegance to any gathering. Here are some creative serving ideas that will impress your guests and make your event memorable.
Plating Ideas
For a beautiful display, consider these plating suggestions:
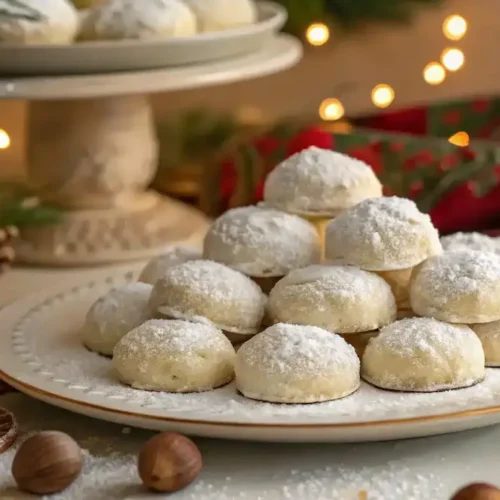
- Arrange the Danish Wedding Cookies on a decorative cake stand. This adds height and draws the eye, making them the centerpiece of your dessert table.
- Use a simple white platter to highlight the cookies’ delicate appearance. Dust them with additional powdered sugar just before serving for a fresh look.
- For a rustic touch, serve them in a wooden bowl or on a slate board. This contrasts nicely with their soft, sweet texture.
Pairing Suggestions
To enhance the experience, pair your Danish Wedding Cookies with complementary flavors:
- Serve them alongside a steaming cup of freshly brewed coffee or a fragrant herbal tea. The warmth of the beverages beautifully balances the cookies’ sweetness.
- Consider adding a side of fresh fruit, such as berries or citrus slices. This not only adds color but also provides a refreshing contrast to the rich, nutty flavors.
- For a festive touch, include a small bowl of whipped cream or a dollop of yogurt. This adds creaminess and makes for a delightful combination.
Creative Serving Options
Depending on the occasion, you can adapt your serving style:
- For casual gatherings, place the cookies in a charming basket lined with a cloth napkin. This invites guests to help themselves and creates a warm, homey feel.
- If you’re hosting a more formal event, consider a dessert buffet. Arrange the Danish Wedding Cookies alongside other sweet treats, allowing guests to mix and match their favorites.
- During holiday celebrations, incorporate them into a festive dessert platter. Add seasonal decorations, like sprigs of holly or cinnamon sticks, to enhance the theme.
Ultimately, Danish Wedding Cookies are versatile and can be served in various settings. Whether you choose a casual or elegant presentation, these cookies will surely be a crowd-pleaser. So, gather your friends and family, and enjoy the sweet tradition of Danish Wedding Cookies together!
Preserving and Reheating Danish Wedding Cookies
To maintain the delightful flavors and melt-in-your-mouth texture of your Danish Wedding Cookies, proper storage is essential. Firstly, store them in an airtight container at room temperature for up to a week. This method keeps them fresh and prevents them from becoming stale. If you want to extend their shelf life, consider freezing them. Danish Wedding Cookies can be frozen for up to three months. Just make sure to place them in a vacuum-sealed bag or an airtight container to avoid freezer burn. When you’re ready to enjoy them, simply let them thaw at room temperature. This way, they will retain their original taste and texture.
Food safety is also important. Always ensure your cookies are completely cooled before storing them. This prevents condensation, which can lead to spoilage or bacterial growth. Additionally, if you notice any signs of mold or an off smell, it’s best to discard them to ensure your health and safety.
Reheating Methods
When it comes to reheating your Danish Wedding Cookies, the goal is to revive their original charm without drying them out. The oven is the best method for this. Preheat your oven to 300°F (150°C). Place the cookies on a baking sheet lined with parchment paper. Heat them for about 5-7 minutes. This gentle warmth will refresh their texture beautifully.
If you’re short on time, the microwave can be used, but with caution. Place a cookie on a microwave-safe plate and cover it with a damp paper towel. Heat it for about 10-15 seconds. This technique adds moisture, preventing the cookie from becoming tough. However, be careful not to overheat, as this can lead to a chewy texture.
For those who own an air fryer, you can also use it to reheat your cookies. Set the air fryer to 300°F (150°C) and heat the cookies for about 3-4 minutes. This method gives them a slightly crispy exterior while keeping the inside soft.
In summary, whether you choose to store your Danish Wedding Cookies at room temperature or in the freezer, and regardless of how you decide to reheat them, these tips will help you enjoy their delightful flavors and textures just as they were intended. Happy indulging!
Conclusion
In summary, making Danish Wedding Cookies is a delightful experience that combines simple techniques with high-quality ingredients. By creaming together butter and powdered sugar, incorporating finely chopped almonds, and shaping the dough into small balls, you create a treat that is not only easy to make but also versatile enough for any occasion. These cookies embody a rich cultural heritage, making them perfect for celebrations, and their sweet, nutty flavor is sure to be a crowd-pleaser. So, gather your ingredients and let your creativity shine as you embark on this baking adventure!
Share Your Experience
We would love to hear about your baking journey! Feel free to share your results or ask any questions you may have. Additionally, don’t hesitate to experiment with variations, such as adding citrus zest or trying different nuts. Cooking is all about having fun, and Danish Wedding Cookies are an excellent choice for anyone looking to get creative in the kitchen. Enjoy the process, and happy baking!
FAQs about Danish Wedding Cookies
Here are some common questions and answers to help you make the best Danish Wedding Cookies!
Can I use different nuts?
Yes, you can certainly substitute almonds with walnuts or pecans for a different flavor. This variation can add a unique twist to your Danish Wedding Cookies.
How can I make them dairy-free?
If you want to make Danish Wedding Cookies dairy-free, simply use a dairy-free butter substitute. This way, everyone can enjoy these delightful treats!
What if my dough is too crumbly?
If your dough feels too crumbly, add a teaspoon of milk to help bind the ingredients together. This small adjustment can make a big difference in achieving the right texture.
Can I decorate these cookies?
Absolutely! You can decorate your Danish Wedding Cookies with a drizzle of chocolate or colorful sprinkles for a festive touch. This adds a fun element to your baking!
How should I store my Danish Wedding Cookies?
To keep your Danish Wedding Cookies fresh, store them in an airtight container at room temperature for up to a week. For longer storage, you can freeze them for up to three months.