

Have you ever craved a light, crispy treat that melts in your mouth? Wafer cookies are not only easy to make, but they also offer a delightful crunch that can be customized to suit any palate. Whether you’re looking for a sweet snack for the kids or a sophisticated dessert for a gathering, wafer cookies are the perfect solution. With their versatile flavors and simple ingredients, these cookies can cater to various dietary preferences, including gluten-free options. So, let’s dive into the world of wafer cookies and explore how to create these delightful treats that everyone will love!
Table of Contents
Key Benefits of Wafer Cookies
Wafer cookies are not just a delightful treat; they come with a host of benefits that make them a favorite in many kitchens. First and foremost, their light texture is simply irresistible. This makes them perfect for snacking or as a base for other desserts. Additionally, they are incredibly easy to make, even for novice bakers. Here are some key benefits:
- Versatile Flavors: You can customize wafer cookies with various flavors. From vanilla to chocolate, the options are endless!
- Kid-Friendly: Kids love them! Their fun shapes and delightful crunch make them a hit at any gathering.
- Gluten-Free Options: You can easily adapt recipes to be gluten-free, ensuring everyone can enjoy them.
- Perfect for Any Occasion: Whether it’s a casual snack or a festive dessert platter, wafer cookies fit right in.
- Customizable: Add your favorite ingredients like nuts or chocolate chips for a personal touch.
In summary, wafer cookies are not only delicious but also versatile and accommodating to various dietary preferences. They truly enhance your baking experience!
Ingredients for Wafer Cookies
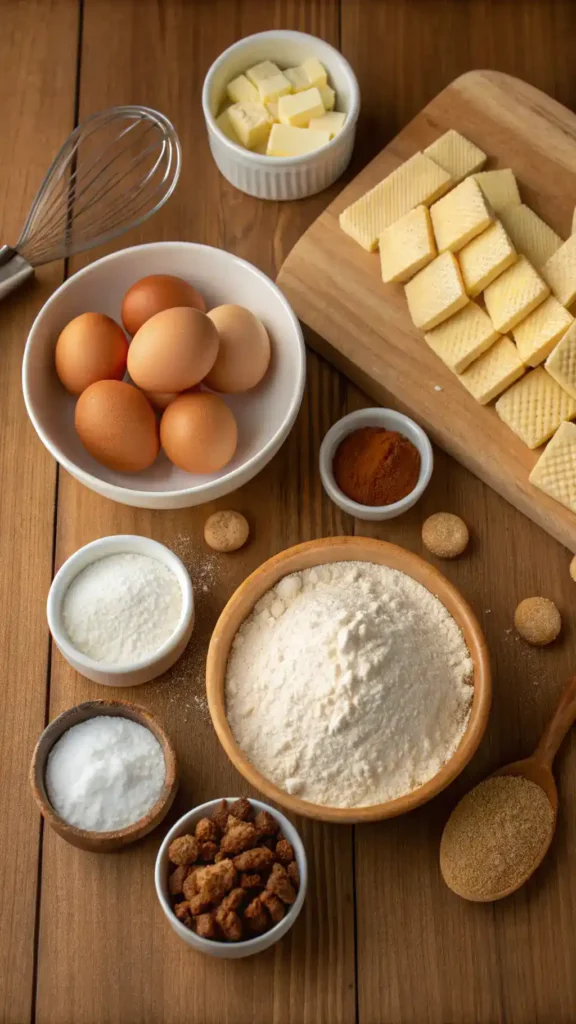
Creating delicious wafer cookies starts with selecting the right ingredients. Here’s a list of what you’ll need:
- All-purpose flour: This is the base of your wafer cookies. If you’re looking for a gluten-free option, consider using almond flour or a gluten-free all-purpose blend.
- Granulated sugar: This sweetener adds the perfect touch of sweetness. For a healthier alternative, you can use coconut sugar or a natural sweetener like stevia.
- Unsalted butter: Butter gives the cookies a rich flavor and tender texture. If you prefer a dairy-free option, coconut oil works wonderfully as a substitute.
- Eggs: Eggs help bind the ingredients together. If you need an egg-free version, try using flaxseed meal mixed with water or a commercial egg replacer.
- Baking powder: This leavening agent ensures your cookies have that delightful crunch. Make sure it’s fresh for the best results.
- Flavor extracts: Vanilla extract is a classic choice, but feel free to experiment with almond or lemon extract for a unique twist.
When selecting your ingredients, freshness is key. Always check the expiration dates on your baking powder and flour. Additionally, if you’re feeling adventurous, consider adding a pinch of salt to enhance the flavors. It’s a small step that makes a big difference!
Now that you have your ingredients ready, you’re one step closer to baking these delightful wafer cookies. Remember, the beauty of wafer cookies lies in their versatility. You can customize them with various flavors and toppings, making them a treat for everyone!
How to Make Wafer Cookies
Making wafer cookies is a delightful experience that anyone can enjoy. Follow these simple steps to create your own batch of crispy, light wafer cookies that are perfect for any occasion.
- Gather Your Ingredients: Start by collecting all your ingredients. You will need flour, sugar, butter, eggs, and flavor extracts. Having everything ready will make the process smoother.
- Preheat Your Oven: Preheat your oven to 350°F (175°C). This step is crucial because a properly heated oven ensures even baking.
- Mix the Dry Ingredients: In a bowl, whisk together the flour and baking powder. This helps to aerate the flour, resulting in a lighter texture for your wafer cookies.
- Cream the Butter and Sugar: In another bowl, cream the softened butter and sugar until light and fluffy. This process usually takes about 3-5 minutes. It’s important because it incorporates air into the mixture, contributing to the cookies’ lightness.
- Add the Eggs: Beat in the eggs one at a time, mixing well after each addition. This step helps to bind the ingredients together.
- Combine Wet and Dry Ingredients: Gradually add the dry mixture to the wet ingredients. Stir until just combined. Be careful not to overmix, as this can lead to tougher cookies.
- Flavor It Up: Now, add your chosen flavor extracts, such as vanilla or almond. This is where you can get creative! You can also fold in chocolate chips or nuts if you like.
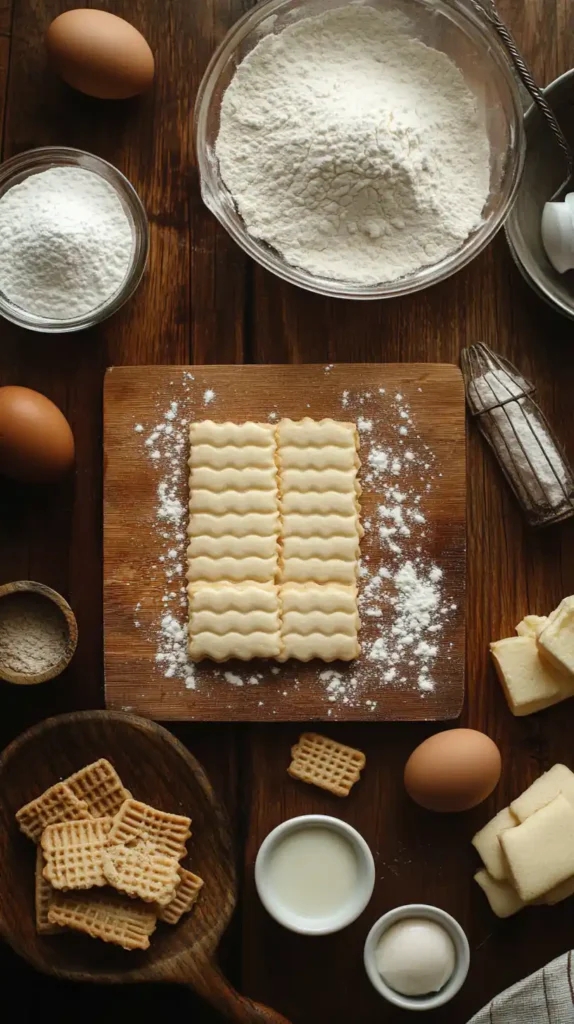
- Roll Out the Dough: On a lightly floured surface, roll out the dough to about 1/8 inch thick. Use a cookie cutter to cut out your desired shapes. Remember, thinner cookies will be crispier!
- Bake the Cookies: Place the cut-out cookies on a baking sheet lined with parchment paper. Bake for 8-10 minutes or until the edges are golden. Keep an eye on them, as they can burn quickly!
- Cool and Enjoy: Once baked, remove the cookies from the oven and let them cool on a wire rack. This step is essential for achieving that delightful crunch.
By following these steps, you’ll create delicious wafer cookies that are sure to impress. Remember, practice makes perfect, so don’t hesitate to experiment with different flavors and toppings!
Pro Tips, Variations, and Common Problems for Wafer Cookies
Making wafer cookies can be a delightful experience, but sometimes things don’t go as planned. Here are some pro tips and variations to elevate your baking game, along with solutions to common problems you might encounter.
Pro Tips
– Achieve the Perfect Texture: For a light and crispy wafer cookie, ensure your butter is softened but not melted. This helps incorporate air into the dough, resulting in a delightful crunch.
– Chill the Dough: If your dough feels too soft, chill it for about 30 minutes. This makes it easier to roll out and helps maintain the shape during baking.
– Use Parchment Paper: Line your baking sheets with parchment paper. This not only prevents sticking but also promotes even baking.
– Monitor Baking Time: Keep a close eye on your cookies. They can go from perfectly golden to overbaked in a matter of seconds. Typically, 8-10 minutes at 350°F (175°C) is ideal.
Creative Variations
– Flavor Infusions: Experiment with different extracts such as almond, lemon, or orange for a unique twist. You can also add spices like cinnamon or nutmeg for warmth.
– Chocolate Dipping: After baking, dip half of each wafer cookie in melted chocolate. This adds a rich flavor and a beautiful finish.
– Nutty Additions: Incorporate finely chopped nuts or seeds into the dough for added texture and flavor. Almonds, walnuts, or even sunflower seeds work wonderfully.
– Gluten-Free Option: Substitute regular flour with a gluten-free blend. This way, everyone can enjoy your delicious wafer cookies!
Common Problems and Solutions
– Cookies Spread Too Much: If your cookies spread excessively, try chilling the dough longer before baking. Additionally, ensure your butter isn’t too warm when mixing.
– Wafer Cookies Are Chewy: This can happen if they are underbaked. Make sure to bake them until they are lightly golden around the edges. They will continue to firm up as they cool.
– Flavor Is Too Bland: If your wafer cookies lack flavor, consider increasing the amount of extract or adding a pinch of salt. Salt enhances sweetness and balances flavors.
– Storing Issues: To keep your wafer cookies fresh, store them in an airtight container at room temperature. If they become soft, you can crisp them up in a preheated oven for a few minutes.
By following these tips and variations, you’ll be well on your way to mastering wafer cookies. Enjoy the process, and don’t hesitate to get creative!
Serving Suggestions for Wafer Cookies
When it comes to serving wafer cookies, the possibilities are as delightful as the cookies themselves! Whether you’re hosting a casual get-together or an elegant dinner party, these light and crunchy treats can elevate any occasion. Here are some creative serving ideas that will impress your guests and make your wafer cookies shine.
Plating Ideas
To showcase your wafer cookies beautifully, consider the following plating tips:
- Arrange the cookies in a tiered dessert stand for a stunning visual effect. This not only adds height but also invites guests to take a closer look.
- For a rustic touch, place the cookies in a wooden bowl or on a slate platter. This contrast enhances their delicate appearance.
- Dust the cookies with powdered sugar or cocoa powder right before serving. This simple touch adds elegance and a hint of sweetness.
Pairing Ideas
Wafer cookies are incredibly versatile and pair wonderfully with various beverages and sides:
- Serve them alongside a steaming cup of coffee or tea. The warmth of the drink complements the crispness of the cookies perfectly.
- For a refreshing twist, offer a glass of cold milk or a fruity smoothie. This combination is especially appealing to kids and adults alike!
- Consider pairing wafer cookies with a scoop of ice cream. The contrast of temperatures and textures creates a delightful dessert experience.
Creative Serving Options
Depending on the occasion, you can serve wafer cookies in different styles:
- For a casual setting, stack the cookies in a mason jar. This not only looks charming but also makes it easy for guests to grab one.
- If you’re hosting a formal dinner, place the cookies on individual dessert plates, garnished with fresh berries or a sprig of mint for a pop of color.
- For family-style gatherings, create a dessert platter featuring wafer cookies alongside other treats like brownies or fruit tarts. This variety will surely please everyone!
Ultimately, serving wafer cookies is all about creativity and presentation. By incorporating these ideas, you can transform a simple treat into a memorable experience that your guests will cherish. So, gather your ingredients, bake those wafer cookies, and get ready to impress!
Preserving and Reheating Wafer Cookies
Wafer cookies are a delightful treat, and knowing how to store and reheat them properly can make all the difference in maintaining their flavor and texture. So, let’s dive into some practical tips that will help you enjoy these crispy delights long after they come out of the oven!
Storage Tips
To keep your wafer cookies fresh, it’s essential to store them correctly. First and foremost, place them in an airtight container. This will help prevent moisture from making them soggy. If you plan to keep them for more than a few days, consider vacuum-sealing them. This method is particularly effective for long-term storage. Wafer cookies can last about a week in the fridge and up to three months in the freezer. However, always ensure they are completely cooled before sealing them away.
Additionally, if you’re freezing them, layer the cookies with parchment paper to avoid sticking. This way, you can easily grab a few at a time without defrosting the entire batch. Remember, food safety is crucial; always check for any signs of spoilage before consuming. If they smell off or have an unusual texture, it’s best to err on the side of caution and discard them.
Reheating Methods
When it comes to reheating wafer cookies, the goal is to restore their delightful crunch without drying them out. The oven is your best bet for this. Preheat your oven to 300°F (150°C). Place the cookies on a baking sheet lined with parchment paper, and heat them for about 5-7 minutes. This gentle reheating will refresh their texture beautifully.
If you’re in a hurry, the microwave can work too, but be cautious. Place a damp paper towel over the cookies and heat them for just 10-15 seconds. This method adds a bit of moisture, helping to prevent them from becoming too hard. However, be careful not to overdo it, as they can quickly turn chewy.
For those who own an air fryer, you can also use it to reheat wafer cookies. Set it to 250°F (120°C) and heat for about 3-5 minutes. This method is quick and effective, ensuring your cookies come out warm and crispy.
In summary, whether you choose to store your wafer cookies in an airtight container or freeze them for later, following these tips will help maintain their delightful flavor and texture. And when it’s time to enjoy them again, reheating them properly will ensure they taste just as good as when they were freshly baked. Happy snacking!
Conclusion
As we wrap up this delightful journey into the world of wafer cookies, let’s take a moment to appreciate how simple yet rewarding this recipe truly is. By combining basic ingredients like flour, sugar, and butter, you can create a light and crunchy treat that’s perfect for any occasion. Moreover, the versatility of wafer cookies allows you to experiment with flavors and textures, making them a fantastic choice for both novice and experienced bakers alike. So, whether you’re whipping them up for a cozy family gathering or a festive celebration, I encourage you to dive in and enjoy the process!
Once you’ve made your batch, I would love to hear about your experience! Feel free to share your results or ask any questions you might have. Additionally, don’t hesitate to get creative with variations—try adding chocolate, nuts, or even a sprinkle of sea salt for a unique twist. Remember, cooking is all about having fun and expressing your culinary creativity. Wafer cookies are not just a treat; they’re an opportunity to explore and enjoy the art of baking. Happy baking!
FAQs about Wafer Cookies
Here are some common questions about wafer cookies that might help you in your baking journey!
1. What are wafer cookies made of?
Wafer cookies are typically made from simple ingredients like flour, sugar, butter, and eggs. You can also add flavor extracts, such as vanilla or almond, to enhance their taste. For a gluten-free option, consider using almond flour or a gluten-free flour blend.
2. How do I get my wafer cookies to be crispy?
To achieve that delightful crunch, make sure to roll the dough thinly before baking. Additionally, bake them until they are lightly golden, but not too dark. If they seem soft after baking, allow them to cool completely on a wire rack, as they will crisp up as they cool.
3. Can I add flavors or mix-ins to my wafer cookies?
Absolutely! Wafer cookies are incredibly versatile. You can mix in chocolate chips, nuts, or even spices like cinnamon. Just remember to adjust the baking time slightly if you add heavier ingredients to ensure they bake evenly.
4. How should I store my wafer cookies?
To keep your wafer cookies fresh, store them in an airtight container at room temperature. If you want to keep them for a longer period, you can freeze them. Just make sure to layer them with parchment paper to prevent sticking.
5. What should I do if my wafer cookies are too soft?
If your wafer cookies turn out too soft, it might be due to underbaking. Next time, try baking them a little longer until they are golden. Alternatively, you can also let them cool completely, as they often firm up as they cool down.

Wafer Cookies
Equipment
- 1 Mixing bowl For mixing dry and wet ingredients.
- 1 Baking sheet For placing cookies before baking.
- 1 Parchment paper To line the baking sheet.
- 1 Rolling Pin For rolling out the dough.
- 1 Cookie cutter To cut out cookie shapes.
- 1 wire rack For cooling the cookies.
Ingredients
Dry Ingredients
- 2 cups All-purpose flour Can substitute with gluten-free flour.
- 1 teaspoon Baking powder Ensure it’s fresh for best results.
Wet Ingredients
- 1 cup Granulated sugar Can substitute with coconut sugar.
- 1/2 cup Unsalted butter Can substitute with coconut oil.
- 2 large Eggs Can use flaxseed meal as an egg replacer.
- 1 teaspoon Flavor extracts Vanilla, almond, or lemon extract.
Instructions
Preparation
- Gather your ingredients and preheat your oven to 350°F (175°C).
Mixing
- In a bowl, whisk together the flour and baking powder. In another bowl, cream the butter and sugar until light and fluffy. Beat in the eggs one at a time, then gradually add the dry mixture to the wet ingredients. Add flavor extracts and mix until just combined.
Rolling and Baking
- Roll out the dough to about 1/8 inch thick, cut out shapes, and place them on a lined baking sheet. Bake for 8-10 minutes or until edges are golden. Cool on a wire rack.
Video
Notes
| Calories | Fat | Protein | Carbs |
|---|---|---|---|
| 120 | 6g | 2g | 18g |